Comma Separated Value or CSV files can be challenging to import because every bank has a different format, but with this guide and a little practice you can easily import your bank transactions yourself.
As you learn how to use this tool it will help if you understand these three major challenges with importing CSV files:
1. The columns of data need to be mapped to match the fields in Cheqbook.
2. As noted every bank on the planet has a proprietary format for their files (literally, we didn't find two alike).
3. These bank formats aren't just different, they're VERY different - and often don't follow good design.
To deal with these issues the Cheqbook team spent months designing a robust tool that can handle most CSV files, and the ones that it cannot import directly can be modified a bit with a spreadsheet program first.
Introduction
To upload a file you start with either a new bank account or an existing one. For existing linked accounts you hit the "Upload" button on the respective accounts manage page. New ones are created on the Dashboard with the button "Create Manual Upload Account".
The existing accounts upload screen will look like this:
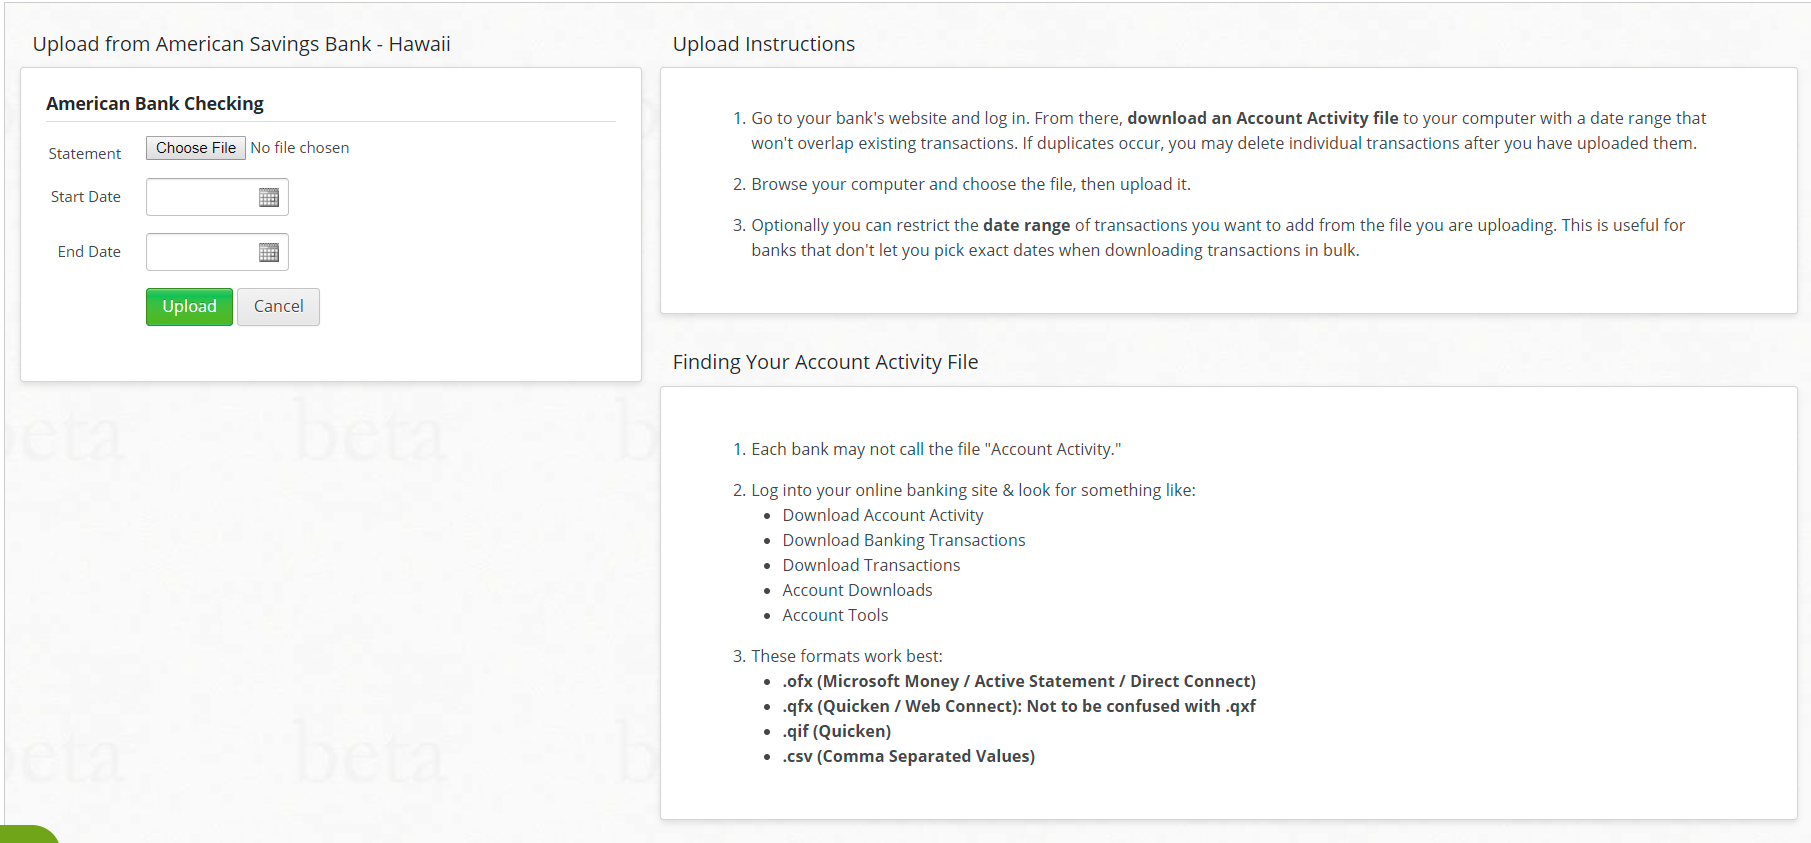
In the upper left corner you choose the file to upload, and if necessary restrict the date range if you only want to import some of the transactions in the file your bank provided.
If you're creating a NEW account, however, the key parts of the screen will be a little different:
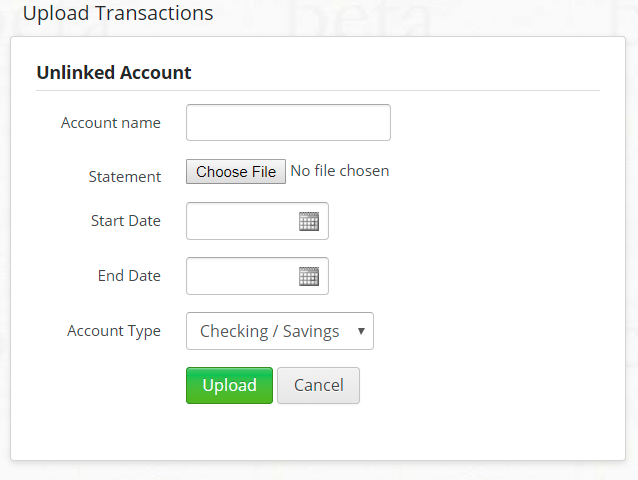
Because the account is new, you will also have to provide the account name, as well as the type: checking or savings account. As before you can restrict the date range here if you need to.
The CSV Upload Screen
If the file you upload is a CSV file (with the extension .csv) you'll see this screen. This screen does NOT show for the other file formats, which don't require any of the steps we're about to explain. Thus whenever possible use the other file formats and not CSV.
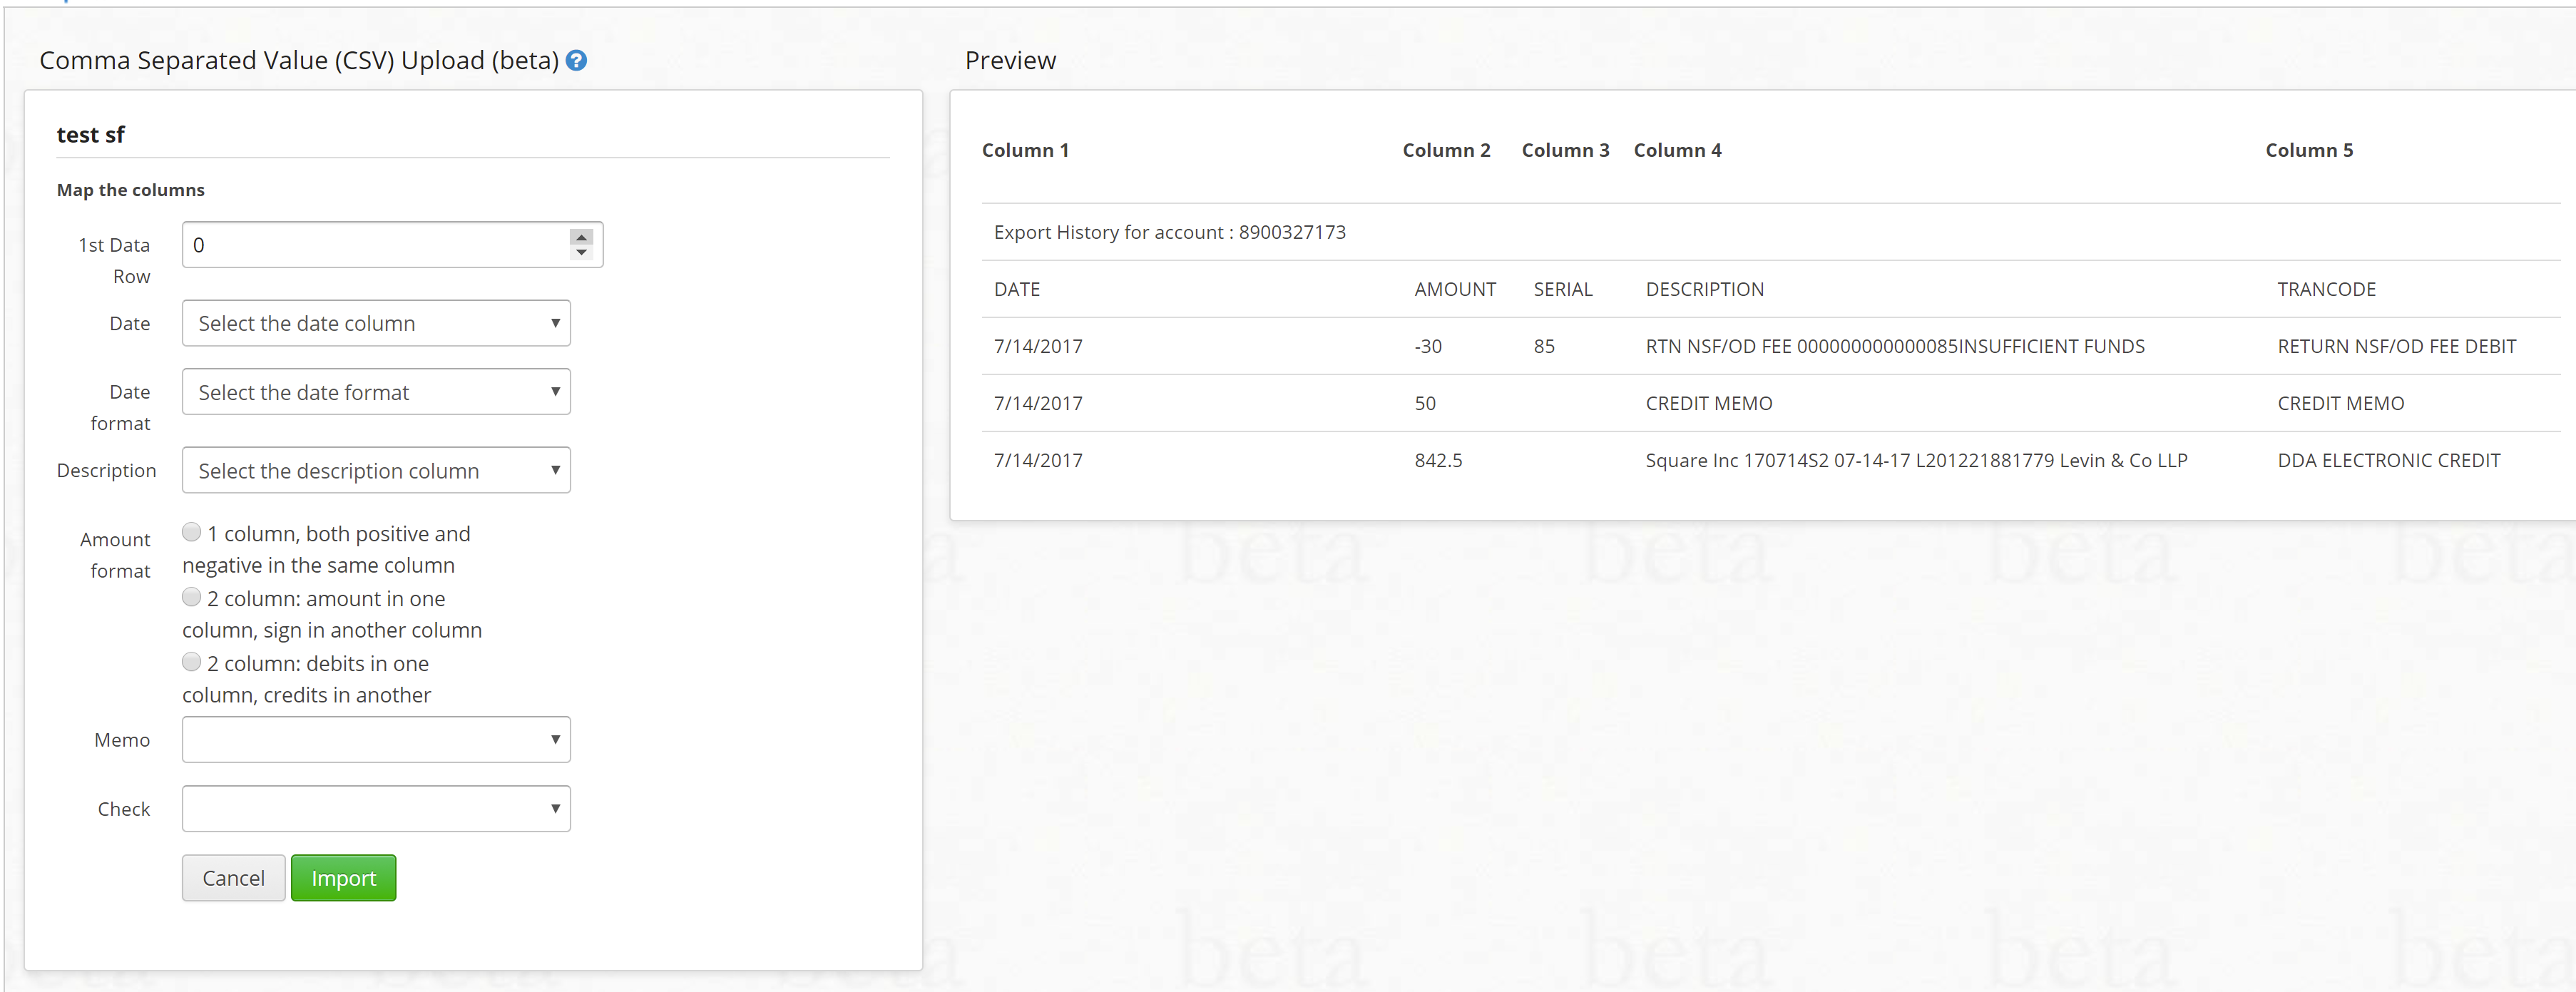
On the left is the mapping tool. You'll have to answer the prompts one line at a time letting Cheqbook know what it needs to properly import your file.
On the right is a preview of your data. As you use this mapping tool the preview will reflect your changes so you can assess whether or not you got it right before you hit the IMPORT button.
What follows is a step by step guide to mapping the fields.
One: Picking the Data from the Headers
The 1st Data Row is used to identify the first row in the table that has the data you wish to import. If you look at the screen shot above which includes all the lines, you see the first line of actual data is after row 2. On the screen shot below, after selecting "2", the top two rows disappear, leaving only the data to be imported.
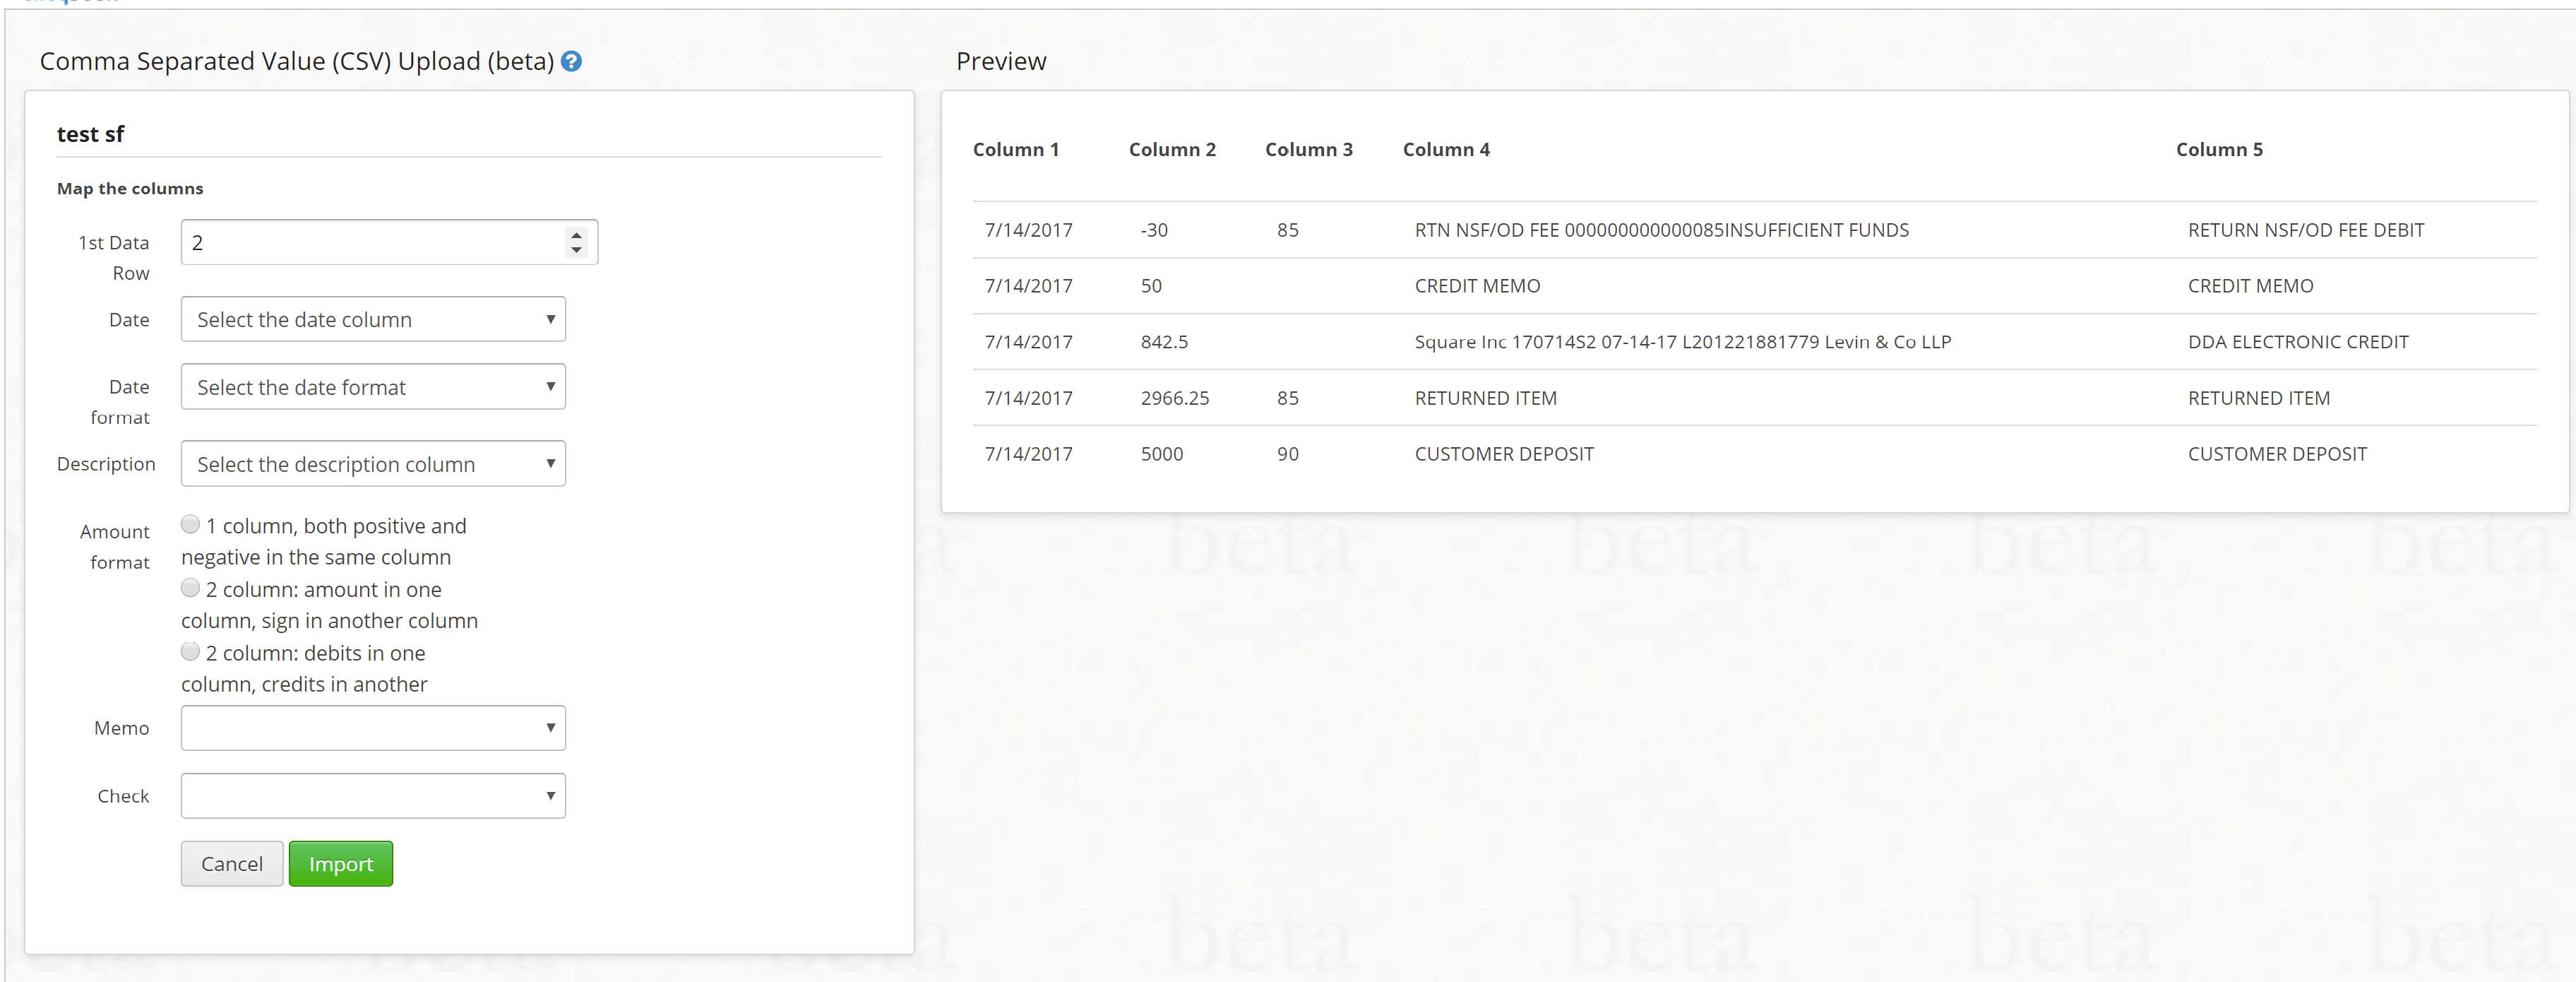
We've seen as many as 9 rows of non-data at the top, so be prepared to keep raising this number until the first data shows up at the top.
Two: Mapping the Columns
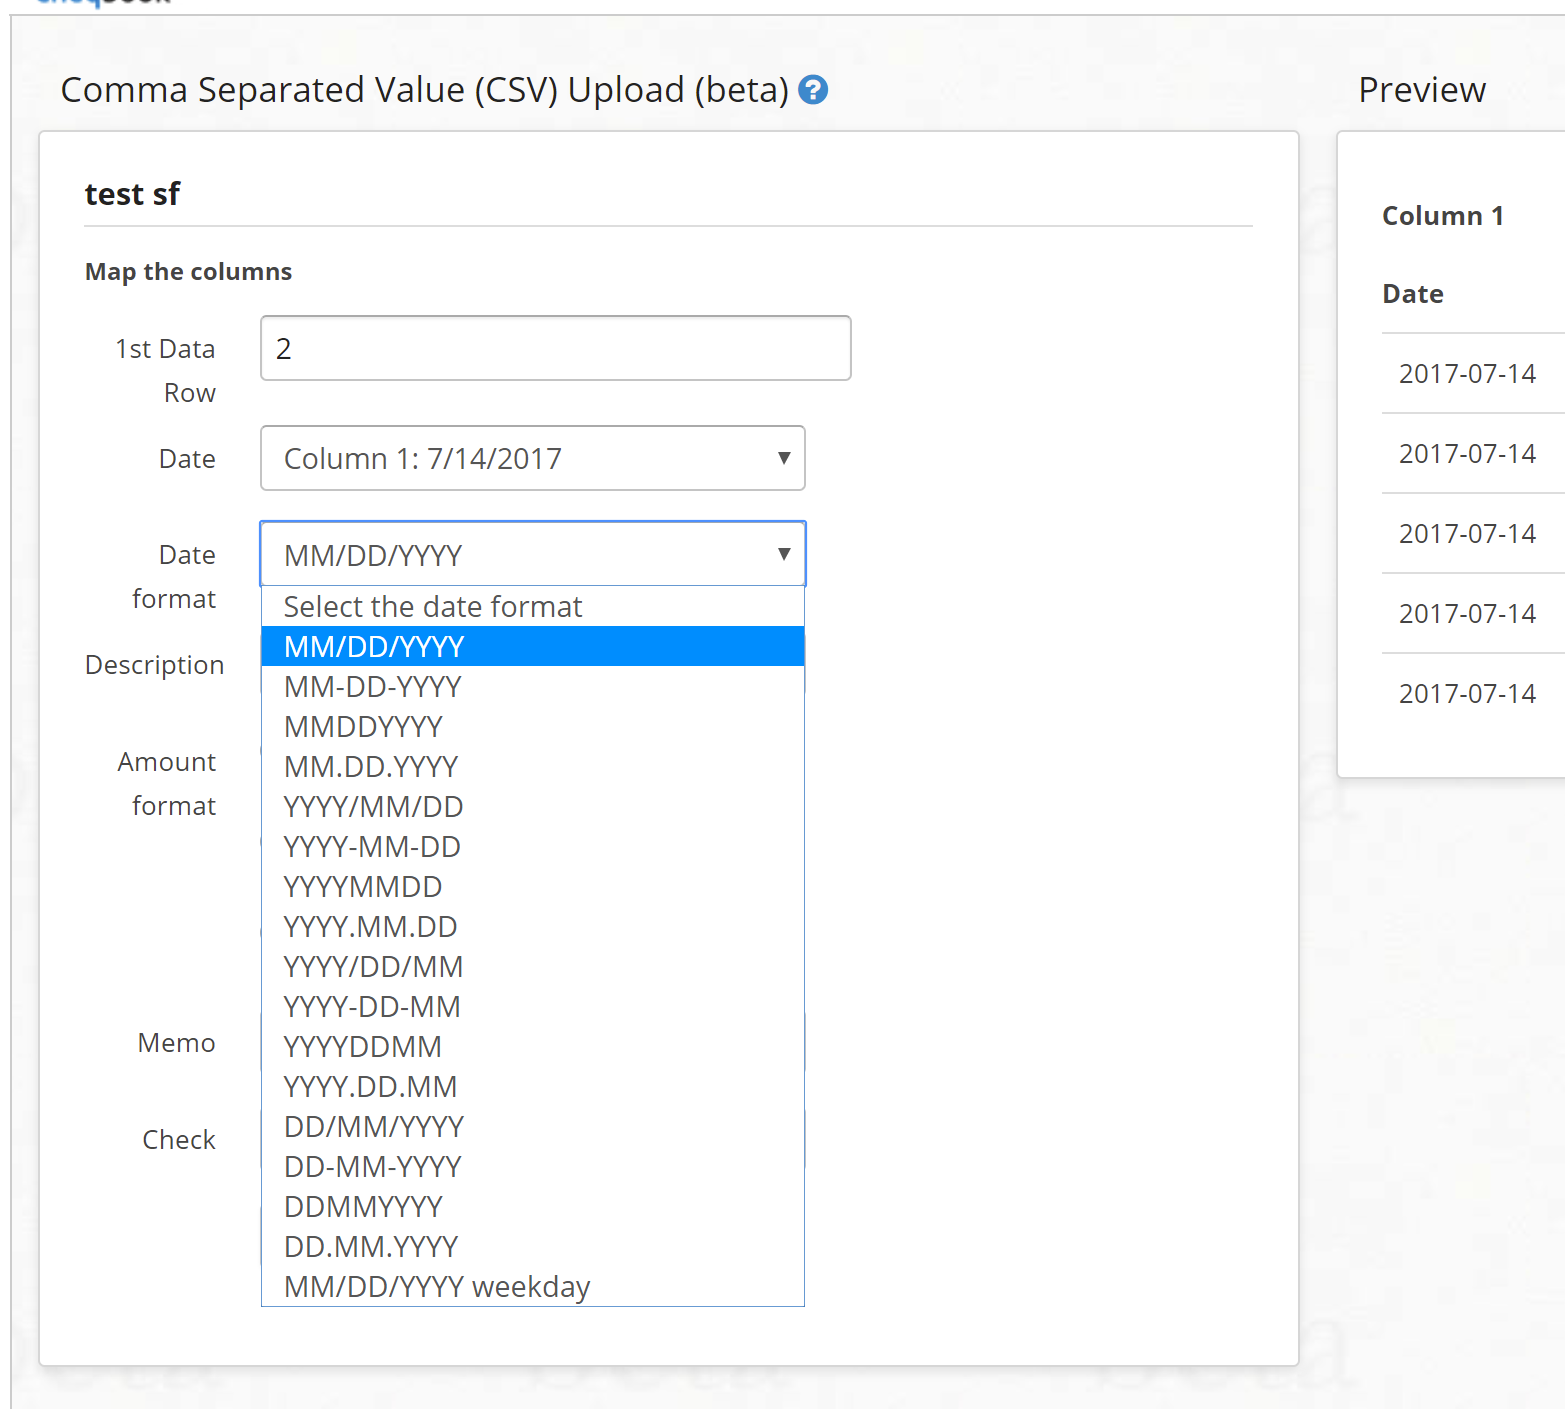
Next select the date column and format. You'll see the column header Date in bold appear to identify this column and if you selected the correct format for the banks data, the format of the preview data will change to YYYY-MM-DD.
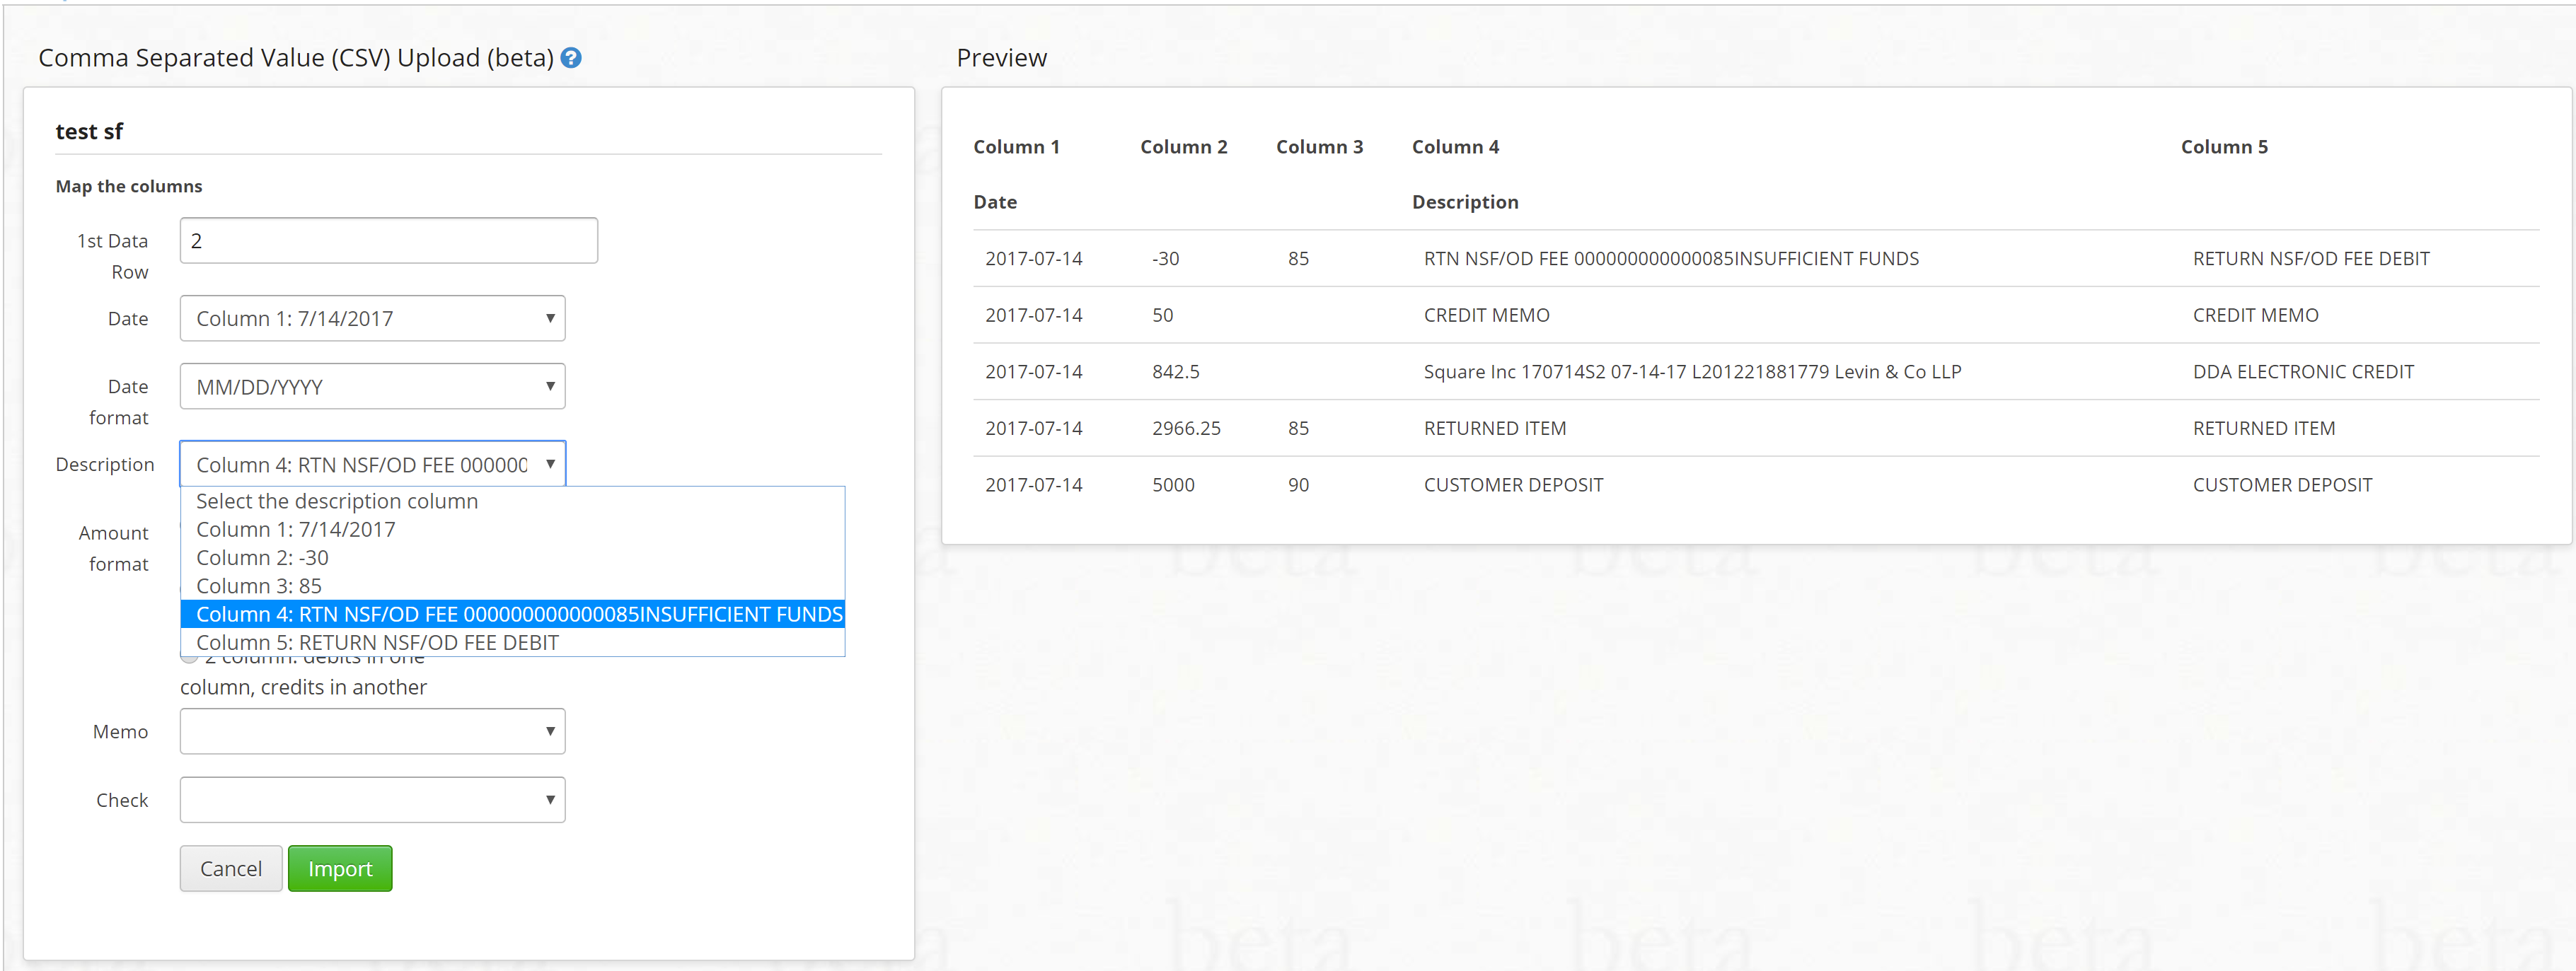
Next select the Description column. HINT: this will be the column used by the blue categorization engine, so make sure it's the one that includes the description of your payees. In this case column 5, will later be mapped to Memo since it describes the type of transaction and not who the parties are. Some banks will not have memo fields, especially credit cards.
Selecting the Amount Format is trickier, and to illustrate we used a challenging one. In this case two of the columns might be amounts: columns 2 or 3. It's hard to tell. To do so we went back to the 1st Data Row and temporarily revealed the original column headings. Column 2 is marked AMOUNT by the bank, and Column 3 is marked SERIAL. It takes a little experience to know that the transaction amount is in column 2, and the check number is in column 3. In this case the format of the amounts is a single column, with transaction types indicated by a minus sign.
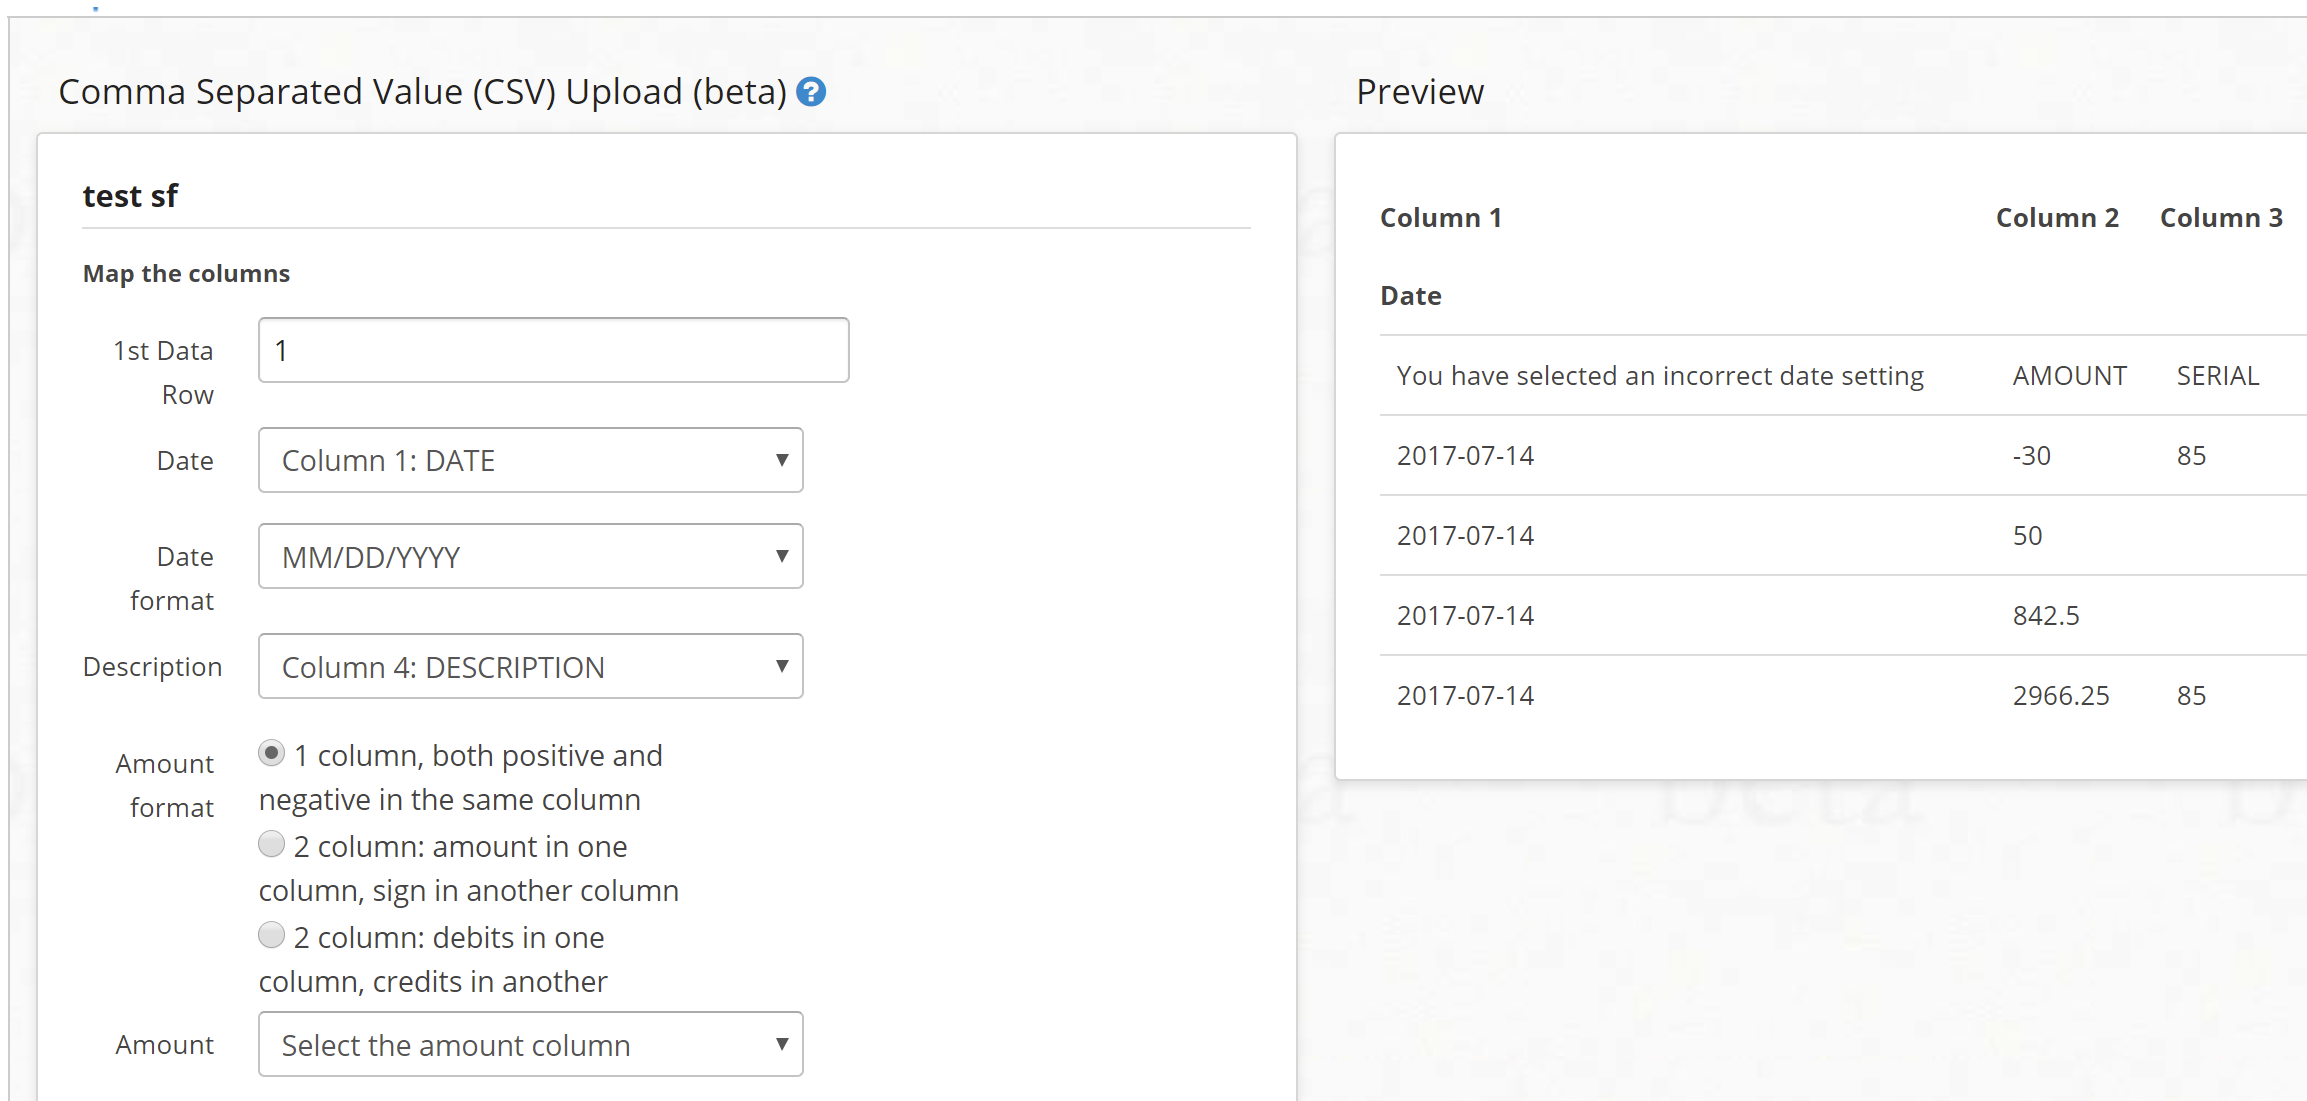
Banks are not consistent about how they report amounts. As you can see the Amount Format has three different selections, carefully pick the one that matches your data.
Very Important: amounts imported must not be formated! They have to be 3204.51 not $3,204.51. If your CSV file is formatted with $ or commas, they MUST be removed before importing. Easiest way is to open in Excel or other spreadsheet and change format of the number columns to be without formatting.
The next step selecting the Expense Indicator is important because it differentiates between deposits and withdrawals in bank accounts (or card payments or purchases with credit cards). In this case expenses are shown as a minus sign.
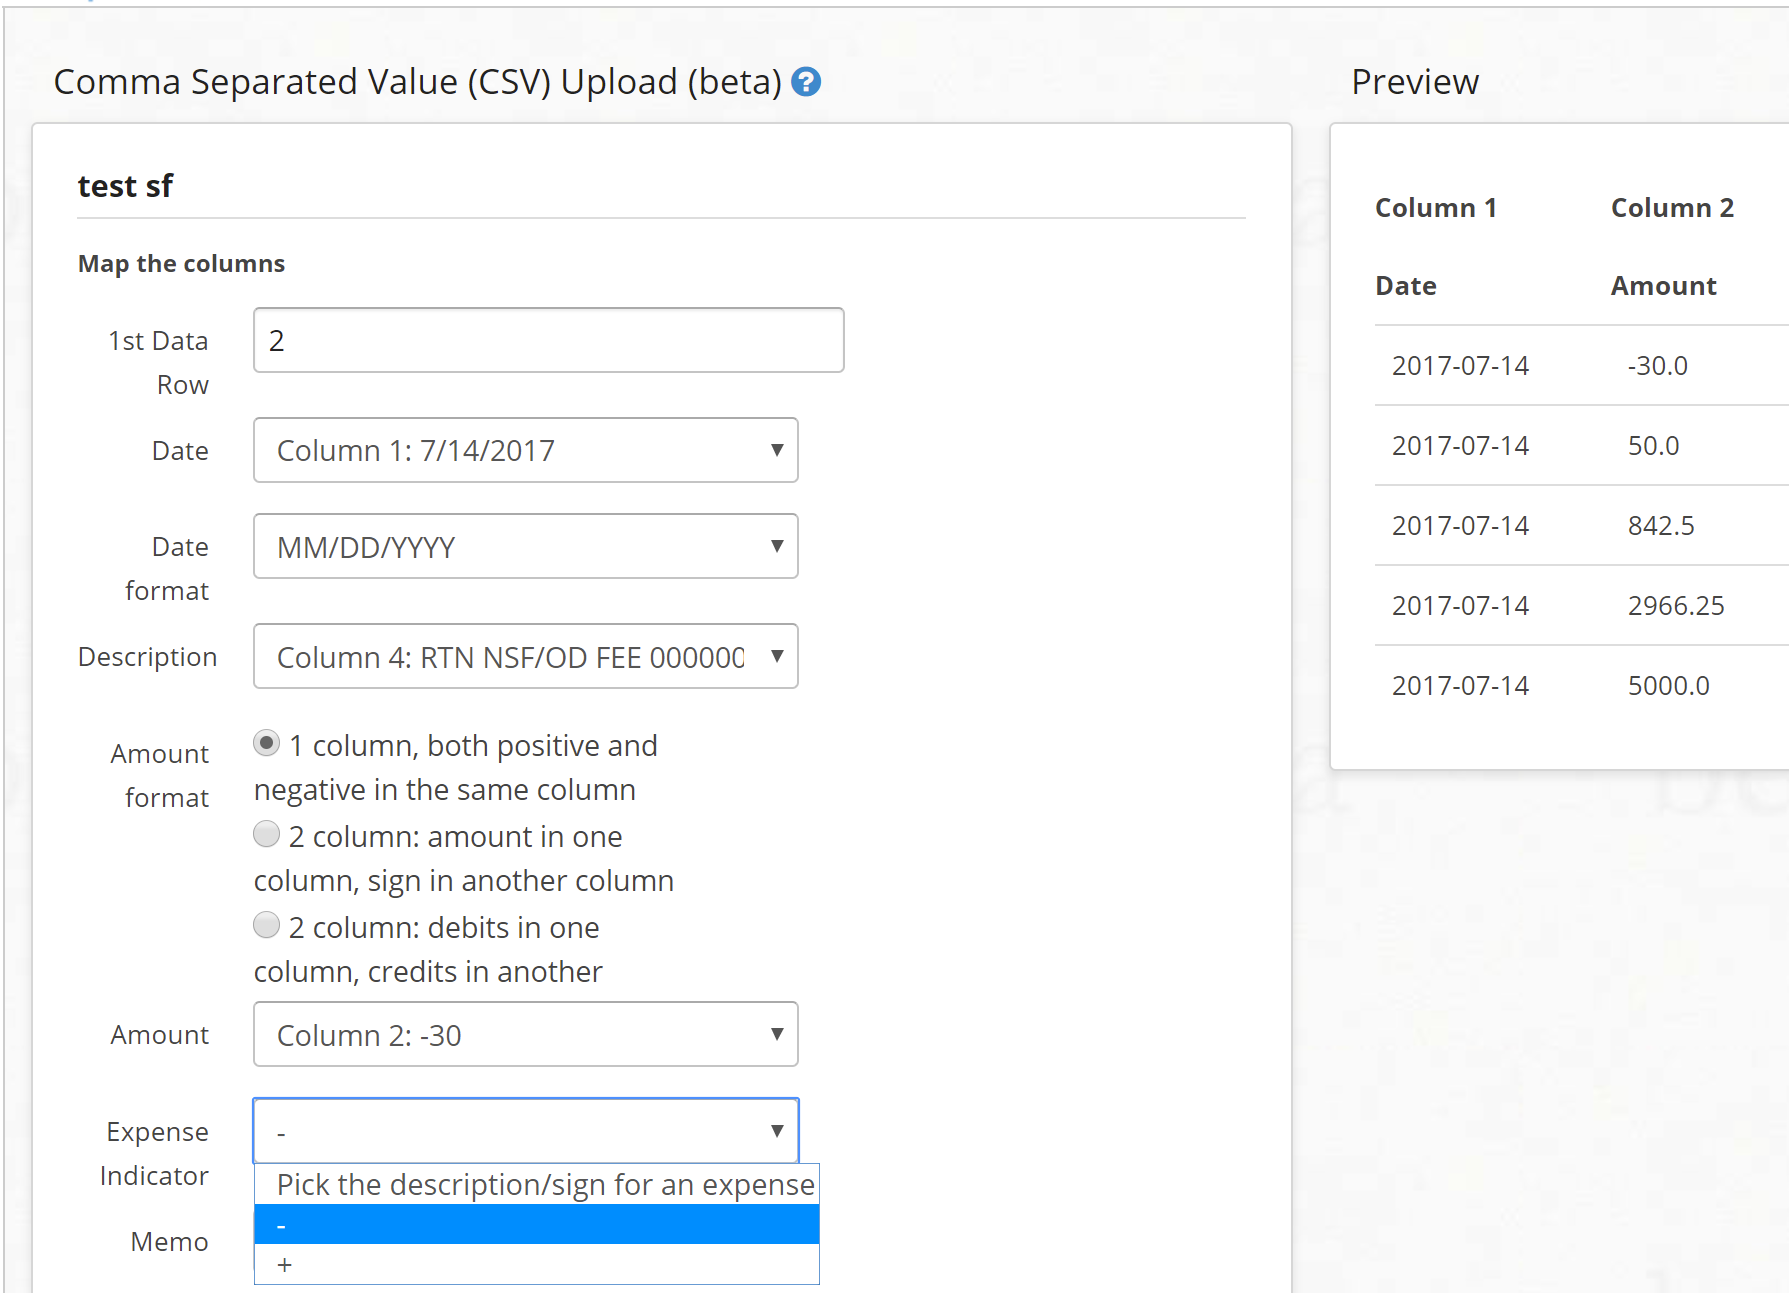
Repeating this: if your amounts have extra symbols like $ or , they have to be removed first. Excel or other spreadsheets are the best tool for this, just format the column to remove the symbols. For example $12,345.67 needs to be 12345.67. A negative symbol is OK -12345.67.
The final answers before Import look like this. Note we've changed the 1st data row back to 2, identified Memo as column 5, and Check as column 3.
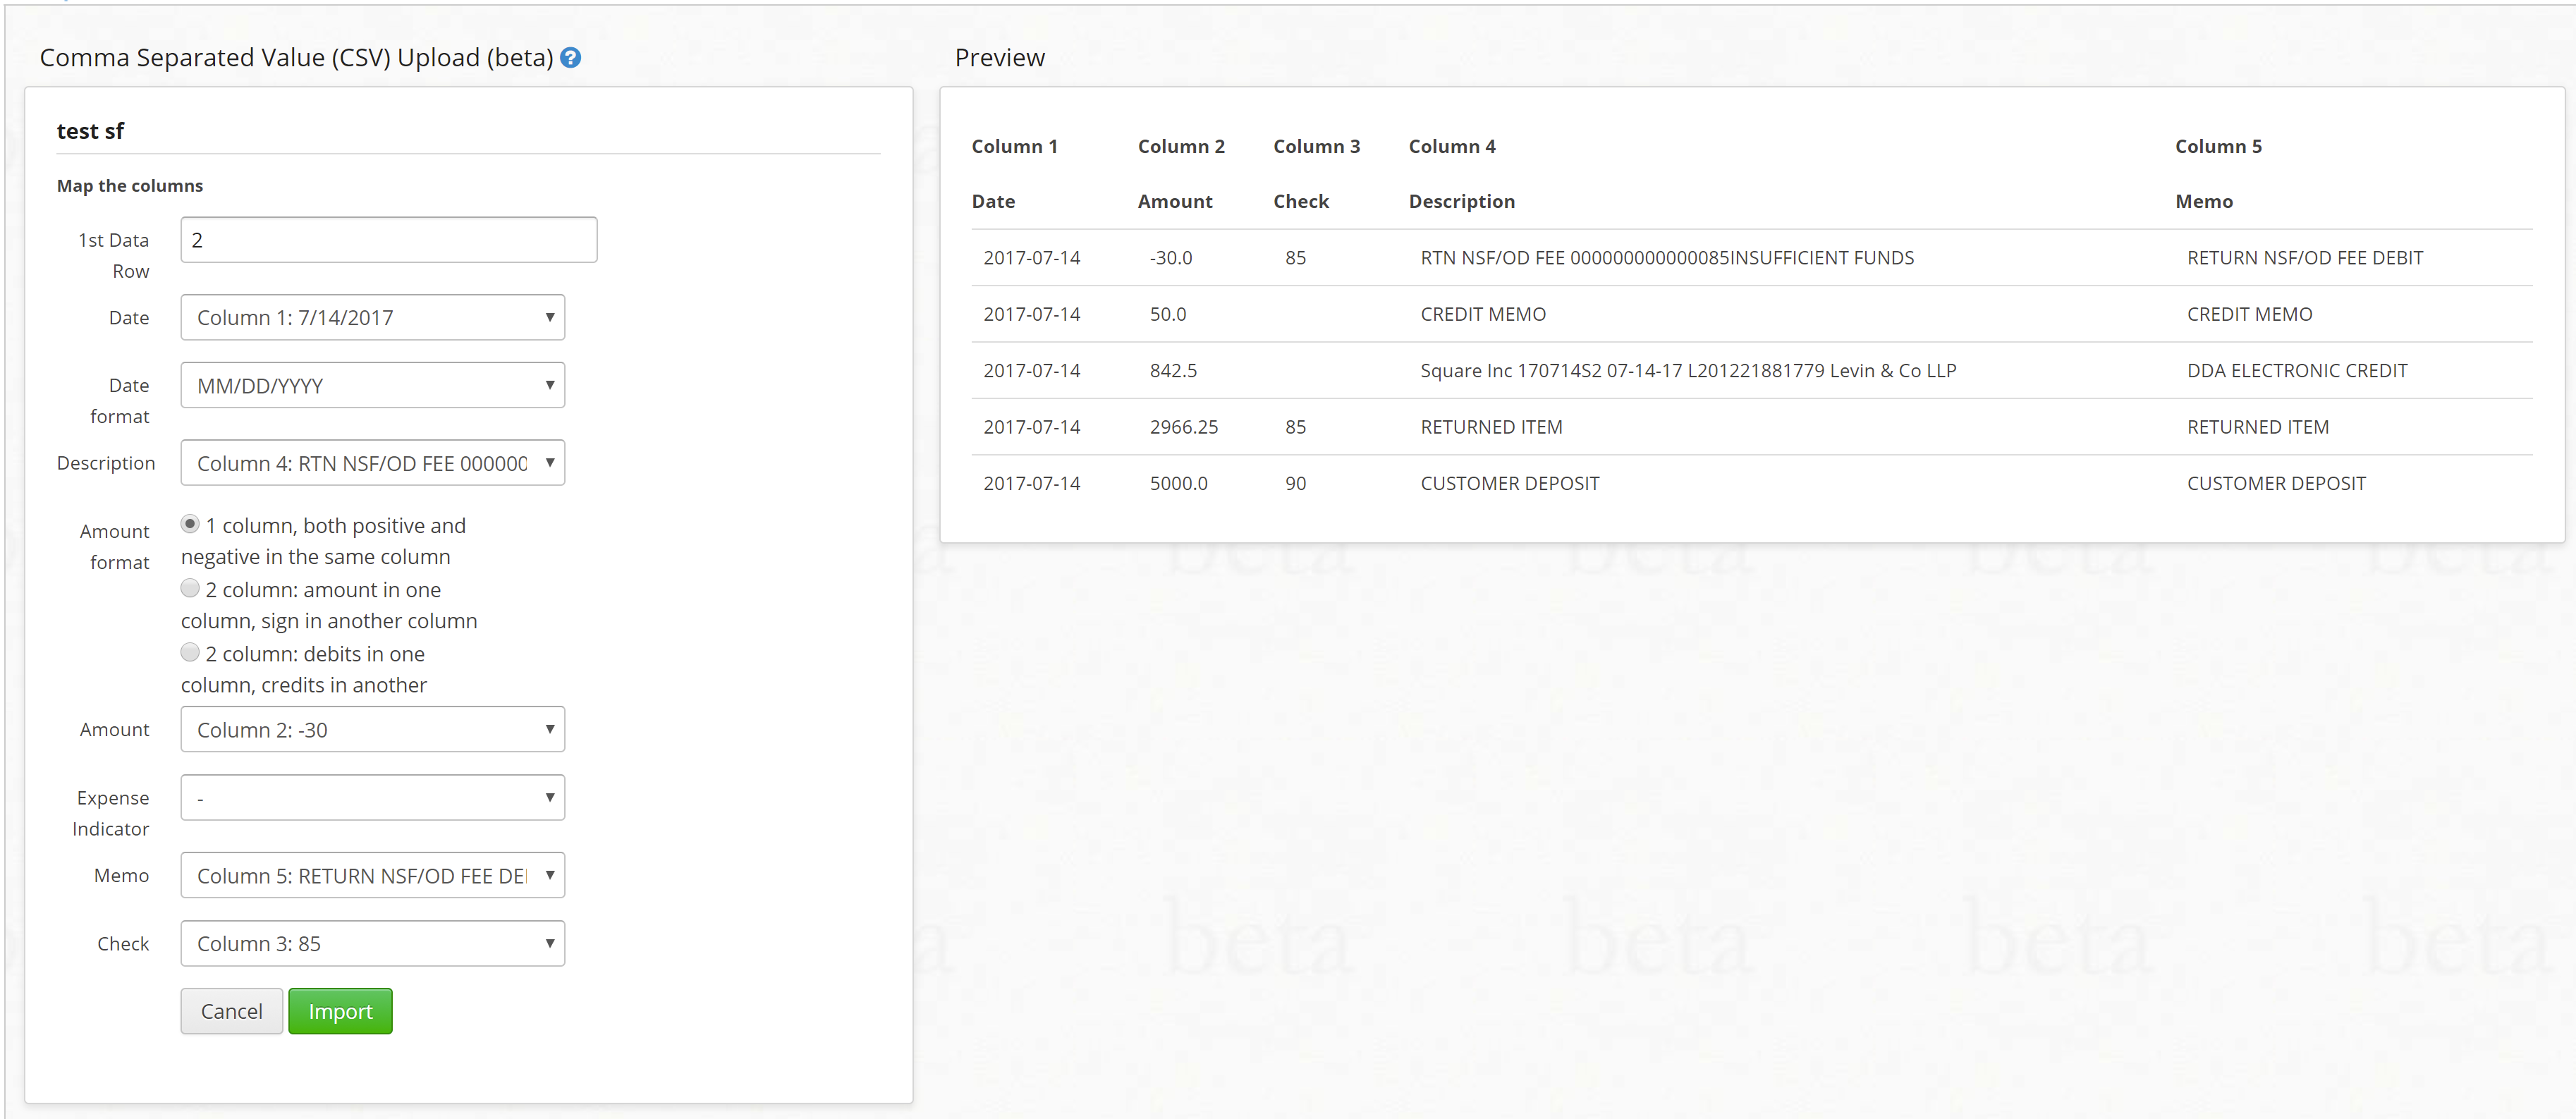
Hit Import
Once you're confident you're answered this prompts correctly, it's time to select the green import button - but not before! If you've answered all the questions and mapped your items correctly, you'll be returned to the dashboard and your transactions will import within a few minutes.
What if it doesn't work? Correcting Errors
In testing we're finding two different types of common problems.
1. The file format from the bank simply doesn't work. Examples include numbers formatted with currency symbols and 000 separators, or using "," as a decimal separator (which is another comma in a CSV file!). In these cases the bank has identified amounts as text field and they simply won't import correctly. You will have to open them up in Excel* or another spreadsheet software to format them correctly as amounts, without any currency or comma separators for the thousands. There may be other format issues we haven't identified yet that you may need Excel to fix. *Note that Excel has it's own problems sometimes, see this FAQ for guidance.
2. The field mapping questions on the left aren't filled out correctly or completely. When you hit Import you get only a generic error message. In these cases you will have to start again and more carefully map the fields. If you still cannot get it to work submit a support ticket with a copy of the file and we will take a look.
Sharing the files you can't make work will be very helpful for us to refine the import function. Eventually when it's robust enough to handle nearly everything we'll build an error reporting mechanism and remove the beta status.
If you still have any other problems, please submit a ticket and we'll be happy to help.

Comments
0 comments
Please sign in to leave a comment.